Showing posts with label Photography. Show all posts

Wednesday, 5 October 2011

Exercise 9:Focal Lengths

This exercise requires me to take 3 to 10 photographs. At each photographs, I will zoom in gradually without moving. Given that I usually only carry a 50mm prime or 24-70mm zoom, so I can really zoom in a large range while find something interesting composition wise. Therefore, I am aiming at 3 shots.


Just for new experience, I try photographing in the Bromley cemetery. I have never thought of photographing at a cemetery, since places like this are considered to be spooky in my country. However, an American friend once told me that she likes to take a walk at cemetery because it is very peaceful. Just for the sake of curiosity, I went there to take a look.


So here are three images gradually zoom in. I want to preserve the tree and the shadow with some tomb stone at side. 

Image 1: 28mm, f/5.6, ISO 400, at 1/250s

Image 2: 44mm, f/5.6, ISO 400, at 1/250s


Image 3: 70mm, f/5.6, ISO 400, at 1/250s


Indeed, if I don't change preceptive, zooming in is the same as using a magnifier. 

Tuesday, 4 October 2011

Exercise 12: Positioning the Horizon

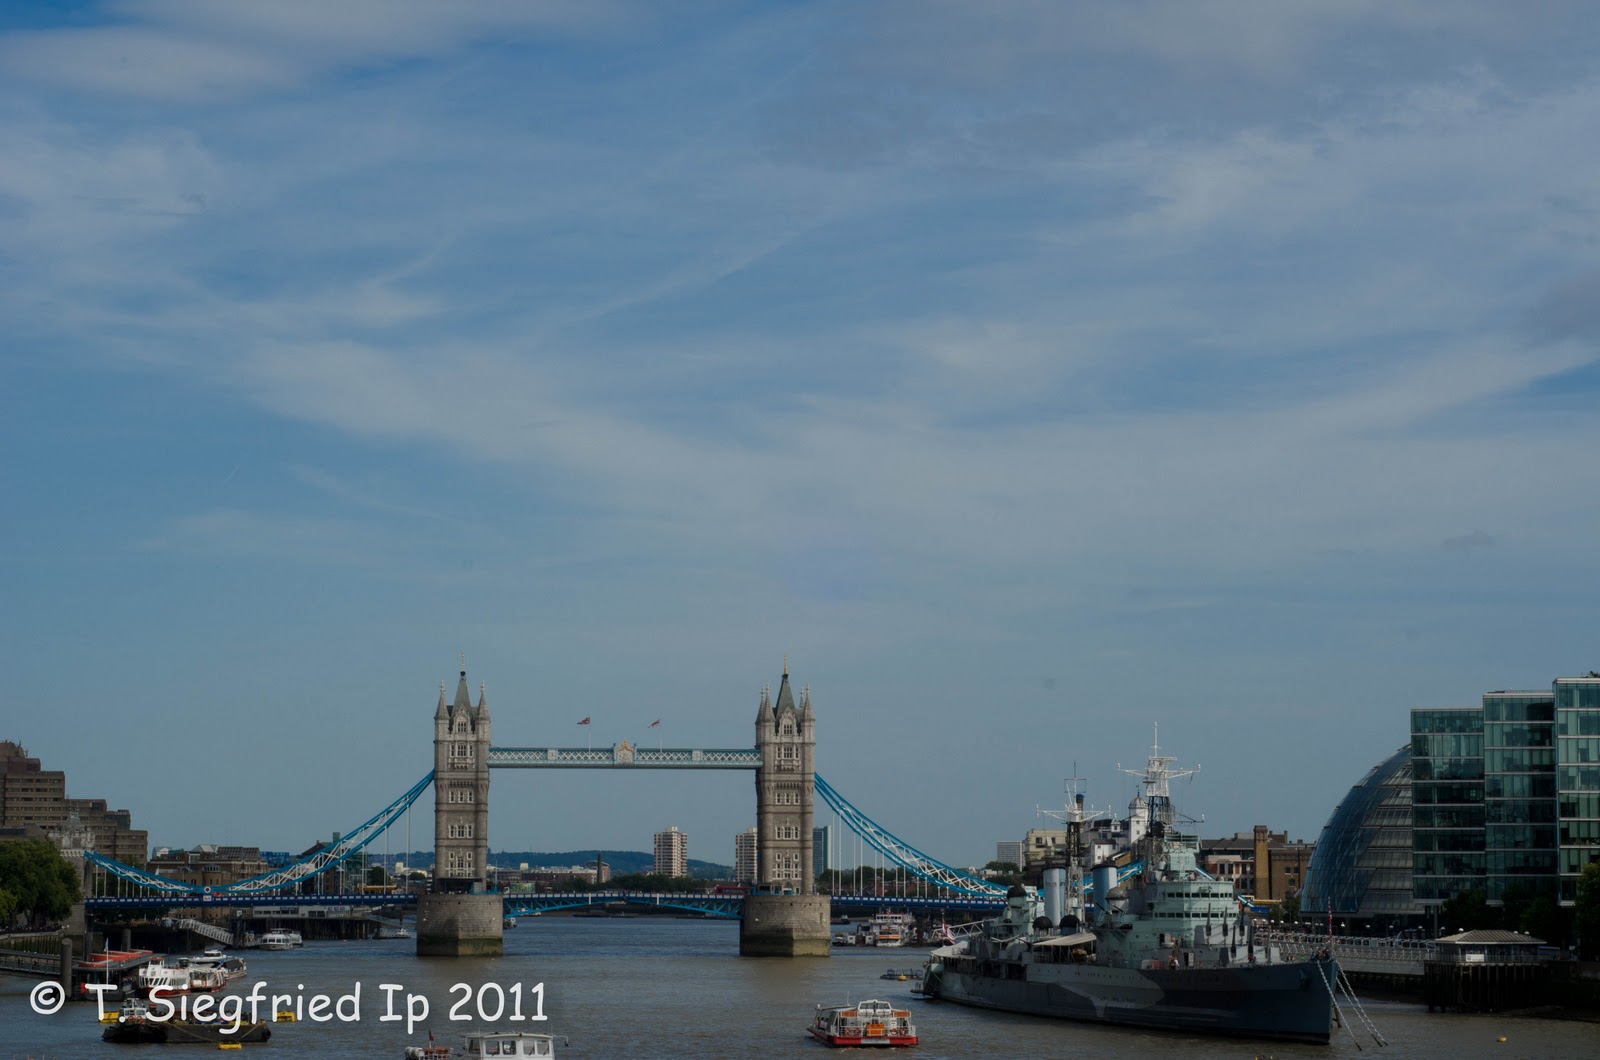
I guess this become a habit for me to skip ahead of exercises and do those that are easier first. In this exercise, I have to look at where the horizon should appear on the photograph. There are high rises everywhere in city of London and it is very difficult to find a pure horizon. So instead, I find something that occupied the horizon. For example, the iconic Tower Bridge.


Image 1 positions the "horizon" on the upper part of the frame, image 2 on the middle, and image 3 on the bottom part.

Image 1: 50mm, f/16, ISO 100, 1/160s

 Image 2: 50mm, f/16, ISO 100, 1/160s

 Image 3: 50mm, f/16, ISO 100, 1/160s

Image 1 has more Thames river. Unfortunately the colour of the river is not that pleasant compare to the sky. Image 3 is better, but it has too much sky on a day that the cloud is not particularly strong (too thin, colour too light). Therefore the image is very heavy on the bottom half. Image 2 is the most  balanced one out of the three: it has some details on the busy river, and some sky. However, image 2 suffers from looking too typical touristy snap shot.


Let's try the same thing with taking a vertical frame instead.

Image 4: 50mm, f/16, ISO 100, 1/160s

Image 5: 50mm, f/16, ISO 100, 1/160s

Image 4 has too much river, but the effect is balance off by the orange floatation. It is looking better than image 1 to 3. Image 5 unfortunately suffers too much sky and bottom heavy again.


Let's try positioning the bridge on horizontal frame. The bridge sits on the middle of the frame in image 6, while it is on the left side of the frame on image 7.

Image 6: 50mm, f/16, ISO 100, 1/160s


Image 7: 50mm, f/16, ISO 100, 1/160s

Overall I think image 4 is the best. There are too many distraction on the side and really not suitable for horizontal frame. The river is dirty and the sky is not too exciting, and the only way to balance it out is the jam in something with different colour on the screen. It seems those orange floatation did the trick. 

Thursday, 29 September 2011

Exercise 6: Fitting the Frame to the Subject

I found this branch as I walked along the Thames one day. I am not sure why, but it looks totally fascinating to me. It is so strange. The branch in my living room is zillion times nicer. But when I saw this on my walk, I stopped.


When I first saw it, this is the image I have in mind.

Image 1: 48mm f/5 ISO 400 at 1/60s

The second image requires the object to fit tight to the frame. I thought it will be a good idea to change angle as well. 
 Image 2: 36mm f/5 ISO 400 at 1/60s


The third image requires me to get close. This is what I see:
 Image 3: 52mm f/5 ISO 400 at 1/60s


The last image is too zoom out. I still prefer my original perspective, but let's try zoom out and vertical this time.
Image 4: 28mm f/5 ISO 400 at 1/60s

The last part of the exercise requires me to crop image 4 and see if I come up with something new. I try several crop, but at the end I like image 1 the best. Given that the branch is the centre of the subject, I like it to occupy bigger space and still sitting in the centre of the image. Or else changing it to portrait orientation is quite nice too.

Image 5 (crop from image 4): 28mm f/5 ISO 400 at 1/60s


Wednesday, 28 September 2011

Exercise 1: Focal Length and Angle of View

This is actually the first exercise out of the book but unfortunately a difficult one because it requires printing and walking with the prints. This exercise requires taking 3 photographs of the same screen on the same spot. The three images will be zoomed at different focal length. I have two tasks here:

1) Look through the viewfinder compare the size of the image by not looking through viewfinder. Find the focal length that roughly two visions are equal in size.
2) Print the images on an A4, then hold them against the actual screen. Move them back and forth until the size is roughly the same as the actual screen.

The lens I use is the 24-70mm f/2.8 and the actual screen is a nearby church (Nice ceiling by the way, I wish I have a ultra-wide that can capture it along with the screen below). So I will zoom at 24mm and 70mm and find the one focal point that the size is similar. 

Image 1: 28mm f/2.8 ISO 3200 at 1/80s


Image 2: 48mm f/2.8 ISO 3200 at 1/80s


Image 3: 70mm f/3.2 ISO 3200 at 1/80s


Because it is indoor and I didn't use flash, the ISO is quite high and I have the aperture open wide. I choose to focus at the text at the end because it is common to three images. I have thought of focusing at the lamp instead, but it's position is too high at the image that I zoom in. I don't like the effect.


The last part of exercise requires me to print out the three pictures on A4, stand at where I was taking the pictures and move them back and forth to see which one appear to be the same size as real life. It is hard to measure distance here given I don't have a ruler at all. The idea should be something like this. We can check an optic text book on the definition of magnification and it is focal length/(distance to object - focal length). For the object I shoot here, the distance is much larger than focal length of the lens, so the magnification (A4 paper/ actual size) is roughly focal length/distance to object. As a result, we see lens with longer focal length will give a bigger magnification and these are telephoto lens. Vice versa.

Exercise 7: Object in Different Positions in the Frame

In this exercise we are trying to put the subject at different position in the frame.


Oddly enough, I was walking on the street one day ans see this line of leafs. I guess it is just the leaf but the combination of the stone path looks interesting to me.


Let's start with the big maple-ish shape leaf at centre but slight near the top.

Image 1: 50mm f/4.5 ISO 1600 at 1/100s


 Now the leaf is on the right hand side of the frame.

Image 2: 50mm f/4.5 ISO 1600 at 1/100s


The leaf is almost centre.
 Image 3: 50mm f/4.5 ISO 1600 at 1/100s


The leaf is centre but close to the bottom.
Image 4: 50mm f/4.5 ISO 1600 at 1/100s 


The last shot below is the shot I like best. The leaf is close to the left side.The determination here is not actually where the leaf is. But but moving the leaf to the left side reveal a trace of leave heading toward the upper right hand corner. I realign the frame so that the diagonal line span from lower left hand corner to upper right hand corner. Sadly the leaf (subject) doesn't have any interesting colour. By putting the subject in this view, other elements in the photographs distract my view from the leaf. If I can set the screen, I will replace it with a red maple leaf.

Image 5: 50mm f/4.5 ISO 1600 at 1/100s


There is a slight concern of the images above. The black metal rod is cropped out from the frame. Originally I was concerning about the leaf and the line, I was not thinking much about the rod. But then when we hit the third image from the top, it sort of getting too ignoring...


Based on the fourth shot (the one I like the best), I take one more shot including the black rod.

Image 6: 50mm f/4.5 ISO 1600 at 1/100s


The image is ok, but now only heaven sees the leaf. The stone path is more the subject here.

Tuesday, 13 September 2011

Exercise 3: Focus At Different Apertures

Now I notice that the real challenge of distance learning is to allocate time each week to study. It is very easy to slip when your day job get busy. I am guilty for not following up with the blog (and my learning) for the past three weeks.

Now I need to catch up.

This exercise is about taking photographs on the same thing with different aperture. In normal portrait world, we tried to use large aperture to create boken. Such that the background is slightly blur and the focus is on our subject. This is normal practice except for environmental portrait. Since the effect in portrait is so well known, I would like to try something else in this exercise: Let’s try the same thing in landscape.

It is very difficult to find exactly what I have in mind, but I settled with an empty space with grass and with two trees at the end. It would be nicer if the houses are not there and the sky is bluer (ie. not so over-exposed). Colour-wise these set of images is not very good and I struggle to find the right colour I want. Any advice on this will be welcome.

Image 1 is what we will typical do in landscape, small aperture to get larger area of the photograph shape. Notice the grass at the bottom of the image.

 Image 1: 48mm f/18 ISO 800 at 1/60s


Now in image 2, the aperture size has been increased. Now we can see the grass in the front starts looking blur.

 
 Image 2: 46mm f/18 ISO 200 at 1/80s

In image 3, the bottom third of the image is very blur


 Image 3: 46mm f/2.8 ISO 200 at 1/250s

Personally I prefer image 1. I don’t really have a subject in this image so I prefer to keep the texture of the grass. Arguably, I can claim my subjects are the trees in image 3. However, if I am after the tree, I might change the composition to move my frame tighter all together.

It is possible to calculate the depth of field. There is a easy to read article written by Norman Koren here: http://www.normankoren.com/Tutorials/MTF6.html

In digital world, I find it easier to just take a shot and check from the LCD.

Friday, 19 August 2011

Exercise 4: Shutter Speeds

This exercise requires me to take a series of image of a moving object (or objects) at different shutter speeds. It should be quite obvious that it will introduce motion blur if the shutter speed is slow enough. My questions are as follow:
1)      We are going to hit slow shutter speed, but how slow do we need? What is the balance between blur and detail?
2)      Can I get good image even in the case when the motion blur is not obvious (ie relative fast shutter speed.
In order to answer the first question, I need some sort of way to measure the speed of the object, even at a pseudo science level. Sadly, I don’t have a speedometer. After some thought I think I can make use of somewhere that has a strictly reinforced speed limit.
There is at least one infamous place where police cameras are set up at the entrance and exit. The urban legend is they use the images before and after to check the time for your car to pass. If your image shows up at the exit too early, you will get a speeding ticket in mail. Not only that, I was told that it follows up with a two and a half hours of speed awareness workshop.


The speed limit is only 20m/h. Most people are driving at the speed limit unless there is a jam ;)


We can also approximate the field of view of the camera, the length of the Tower Bridge can be found in first image in Wikipedia (http://en.wikipedia.org/wiki/File:Tower_bridge_schm020.png)

Cool, let's rock and roll.


So I start with this image.
Image 1: 28mm f/5.6 ISO 800 at 1/50s


Hmm, I don't like it.


Look, the intention here is clear. At the end I want to take pictures at slow shutter speed so that I can see the trace of light on the road. At slow shutter speed, it makes sense. At 1/50s, this picture is just boring.


Ok. I am flipping it around. I actually have nice background here. Why don't I get some of it? The end result is something like this:

Image2: 28mm f/32 ISO 100 at 10sec

Better. But why I feel everything leaning on the right? 

Here is a problem. I think I am not accustom to look around at the frame enough. I know what I am trying to get, I just shoot and miss the details. Damn.

Let's start all over again before it gets too dark. I will  move my camera a little bit. We start with fast(er) shutter and go down.

Image 3: 28mm f6.3 ISO 800 at 1/20s

Image 4: 28mm f/6.3 ISO 400 at 1/10s

Image 5: 28mm f/6.3 ISO 200 at 1/5s

Image 6: 28mm f6.3 ISO 100 1/3s

Image 7: 28mm f/11 ISO 100 at 1.3s

Image 8: 28mm f/16 ISO 100 at 2.5s

Image 9: 28mm f/20 ISO 100 5sec

Image 10: f2.8 f/32 ISO 100 10sec


Even with this composition, the picuture is still slightly heavy on the right hand side. I reckon the best to do this shot is in the middle of the road between two lanes with a wide angle lens, so that the tower is at the middle. Of course, I will get arrested if I set up a tripod there. I move the tower as close to centre of the frame as possible. There is a trade off: because I am clearly on one side of the road, if I force the tower to centre, I will get least light from the car but more stupid people who leaning on the fence taking picture (As you can see, there are shadows around the lower right corner). Of course I can keep the overall exposure darker so that those shadow are darker and blend into the background. But then there is another trade off. If the overall exposure is darker, the details on the first tower look darker as well. 

You really can't have it all, unless, you buy up the whole town : D

Last but not the least, the whole idea to get to somewhere with speed limit is to compare that to shutter speed. So how are we doing? From the diagram from Wikipedia and the photographs taken is about 2/3 of 270 feet (82m), which is roughly 54m. The 20mph speed limit translate to roughly 9m/s. As a result it takes a car slightly less than 7 seconds to get through the frame. This is consistent with the result we see: We can almost unbroken beam across the frame at 5s and 10s exposure. Notice that in image 10 I was already at f/32 and ISO 100, therefore, I can't really run the camera any slower without risk of over-exposing the photograph while getting a continuous light beam.

Friday, 12 August 2011

Exercise 8: A Sequence of Composition

Due to many reasons, I jump to exercise 8 first. I will do the exercise in order starting next week from exercise 1.

In this exercise, I am required to follow the subject around and record all the moment that is "almost" right. It think the exercise wants to make me stick around the screen for a while instead of snapping one shot and leave.


By the way, I will start labelling my photographs in numbers going forward. I think this is a good practice since I am now doing this Art of Photography course, who knows one day I need to discuss my work with my tutor and we want to refer to a particular photograph?


When planning for this exercise, I thought it would be a good experience if I attempt something that I have not tried before. After speaking to my friend Trung, he told me about the leisure centre that he and his friends play football in the evening. Then when I arrived, he told me that the folks at the big field is very good, so I went to take some shots.


The subject I am after is a team called "Aston Carter FC" (the green team). They are based in Leyton and are playing for the London summer football league.


Just arrive at the field, a player is putting on his boots and shoes.
Image 1: 200mm f/5.6 ISO 1600 at 1/200s

Then, the match started.
Image 2: 160mm f/4 ISO 1250 at 1/160s

Two teams were fighting to get the ball.
Image 3: 200mm f/4 ISO 1250 at 1/160s

Oops, the guys from the other team got the ball.
Image 4: 200mm f/4 ISO 1250 at 1/160s

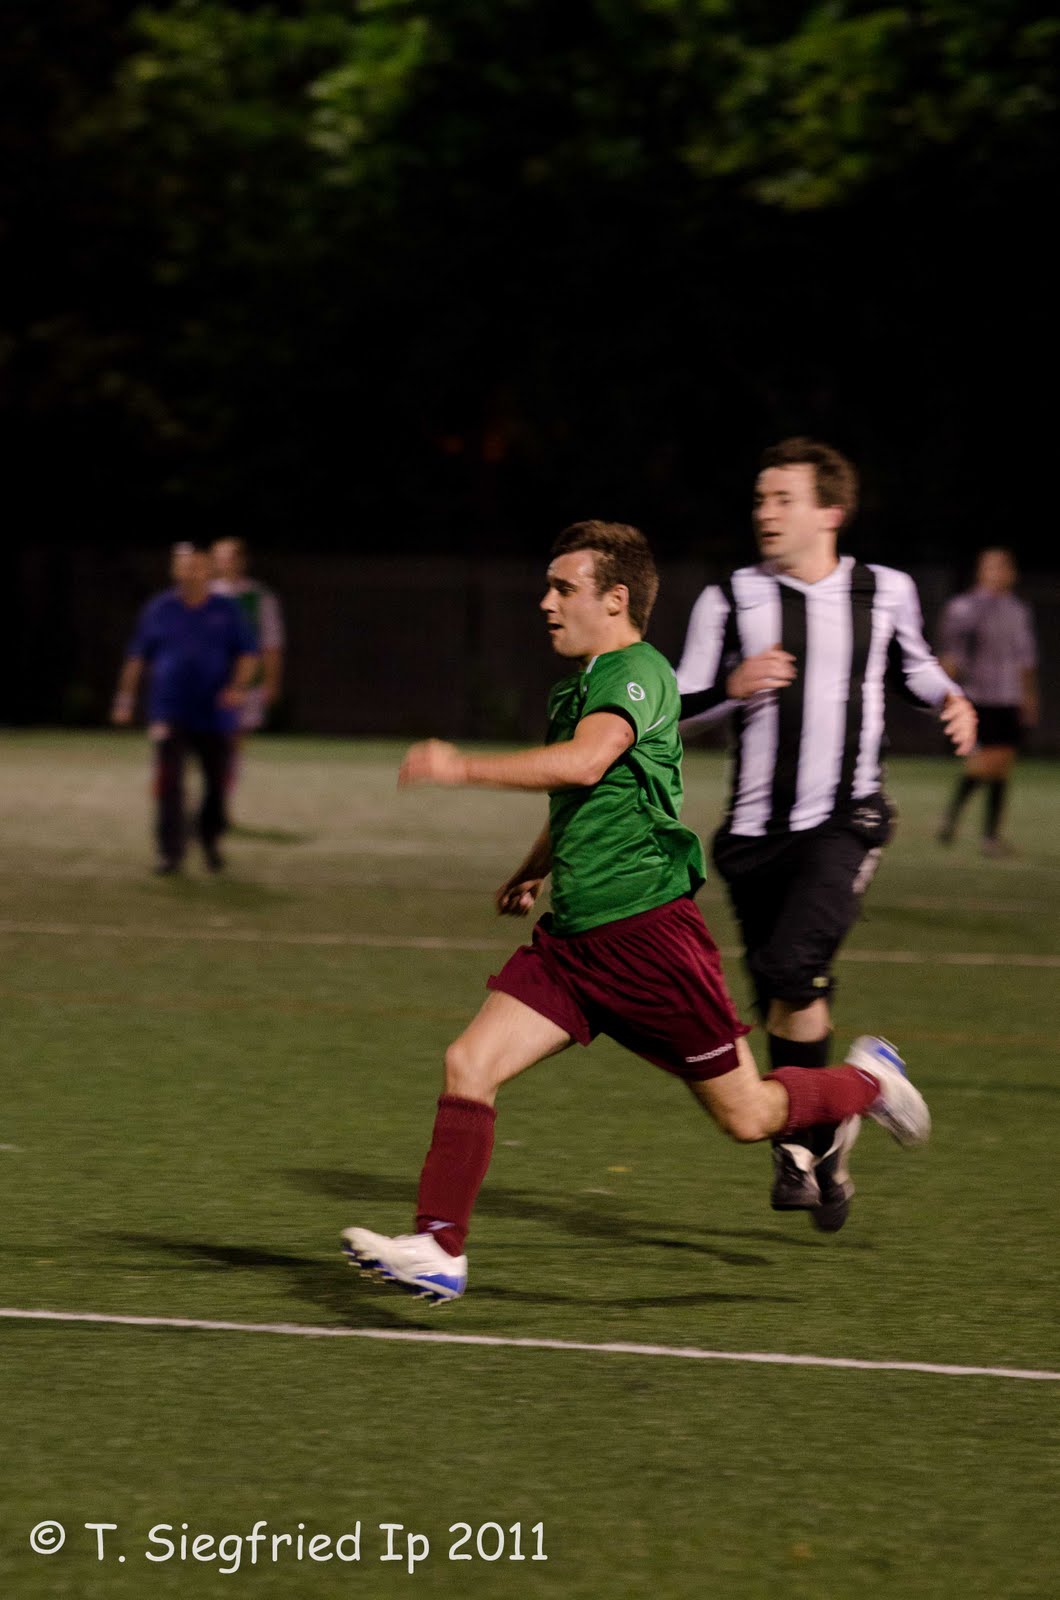
 A player from Aston Carter FC got control of the ball, and trying to fend off the guys from the other team.
 Image 5-8: 200mm f/3.5 ISO 1250 at 1/160s


It is already dark, but both team is still trying very hard. As the lighting condition get poorer, I have to stick with larger aperture and higher ISO, which mean getting the correct focus will be more difficult.

Image 9: 70mm f/2.8 ISO 1600 at 1/160s

The guys are trying hard.
Image 10: 200mm f/2.8 ISO 1600 at 1/160s

The ball is up there!
Image 11: 200mm f/2.8 ISO 1600 at 1/160s

Obviously, the other team is not going to give up easily.
Image 12: 130mm f/2.8 ISO 1600 at 1/160s 

Image 13: 170mm f/2.8 ISO 1600 at 1/160s

Somebody is trying to stop him..
Image 14: 170mm f/2.8 !SO 1600 at 1/160s

Then it almost went off the side.
Image 15: 130mm f/2.8 ISO 1600 at 1/160s


Then the ball went off the other way. Everybody is chasing it.
Image 16: 200mm f/2.8 ISO 1600 at 1/160s

Other people are going along. Picking up speed here.
Image 17: 130mm f/2.8 ISO 1600 at 1/160s

Image 18: 130mm f/2.8 ISO 1600 at 1/160s

I think they made it this time. So I miss the shot...
Image19: 200mm f/2.8 ISO 1600 at 1/160s

Not soon after this, the game ended. The players are all exhausted. They went off to the branch to get some water.
Image 20: 200mm f/2.8 ISO 1600 at 1/160s

Image 21: 200mm f/2.8 ISO 1600 at 1/160s

End of the game. The field is now quite again.
Image 22: 200mm f/2.8 ISO 1600 at 1/160s

This is my first attempt to photograph a football game. I guess it happens to be at night add some more difficulties, but I try to use the field as background, so I catch some light bouncing off the grass. Those images usually look better than those against a dark background at the far side. The most difficult part is using autofocus. Because the players coming in and out of the frame, and because the depth of field is shallow, the AF system got confused very often on which part of the frame it is focusing. I think next time I should try doing manual focus and see if I can get better result. The other issue is, even with a 200mm lens, it is not giving long enough reach. Therefore, all the images above involved some sort of cropping. Also, I leave some spacing in case the players suddenly dashing off the frame. I hope as I got more experience, I can keep a tighter frame on the players.
I think having the subject as the whole team instead of a particular player (not that I know any of them) makes this assignment slightly easier.